 AI Models Company
Start with one character, one scene and one finished post. This cafe-themed walkthrough shows how to prepare a reference, write the prompt, review the image and assemble a first post. Adapt the prompts and builder to your own character. Existing public-gallery images illustrate the steps.
1. Give the character an account worth following
Choose the subject before making a folder of unrelated pictures. A face gives you a visual identity; a theme tells you what to publish with it.
For this example, our character is Nora, a fictional adult who shares cafe scenes, small workday routines and outfit ideas. That gives us three repeatable formats: a cafe photo with a short observation, a planning scene, and an outfit for a day out.
| Decision | Our example | What it controls |
|---|---|---|
| Character | Nora, a fictional adult aged 29 | Name, voice and account identity |
| Audience | People who enjoy cafes and everyday style | Locations and post ideas |
| Fixed appearance | Long dark brown hair, hazel eyes, dark brows, natural makeup | References and continuity checks |
| First scene | Seated at a cafe, holding a plain cup | Prompt and review |
| First format | One vertical image and a short caption | Composition and export |
| Voice | Brief, observant and conversational | Captions and replies |
Write your version in six lines. “A stylish person” leaves almost every production choice open. “Cafe scenes and workday outfits” gives you a practical starting point. Before moving on, think of three posts that belong on that same account.
2. Choose a route to the first identity
You can create an original portrait in an image editor, train a reusable identity, or start with a finished character package. A reference-based editor gives you a direct first workflow: choose the portrait, attach it, then describe a new scene.
If you already have a licensed character, start with its references. If you are starting from text, use the portrait prompt below. Training is a separate project involving a dataset and compatible tools; investigate it if the reference workflow cannot handle your required scenes. Our consistency guide explains that decision.
The browser steps here use Gemini Apps. Google’s image help page documents image creation, uploaded-image editing and full-size downloads. The same portrait-to-scene structure works in another editor with reference inputs, though its controls will differ.
3. Make a portrait you can reuse
In Gemini, choose Images from the sidebar and enter a portrait request. Start with one clearly visible face and a plain background. A crowded scene makes it harder to decide whether you like the character or just the styling.
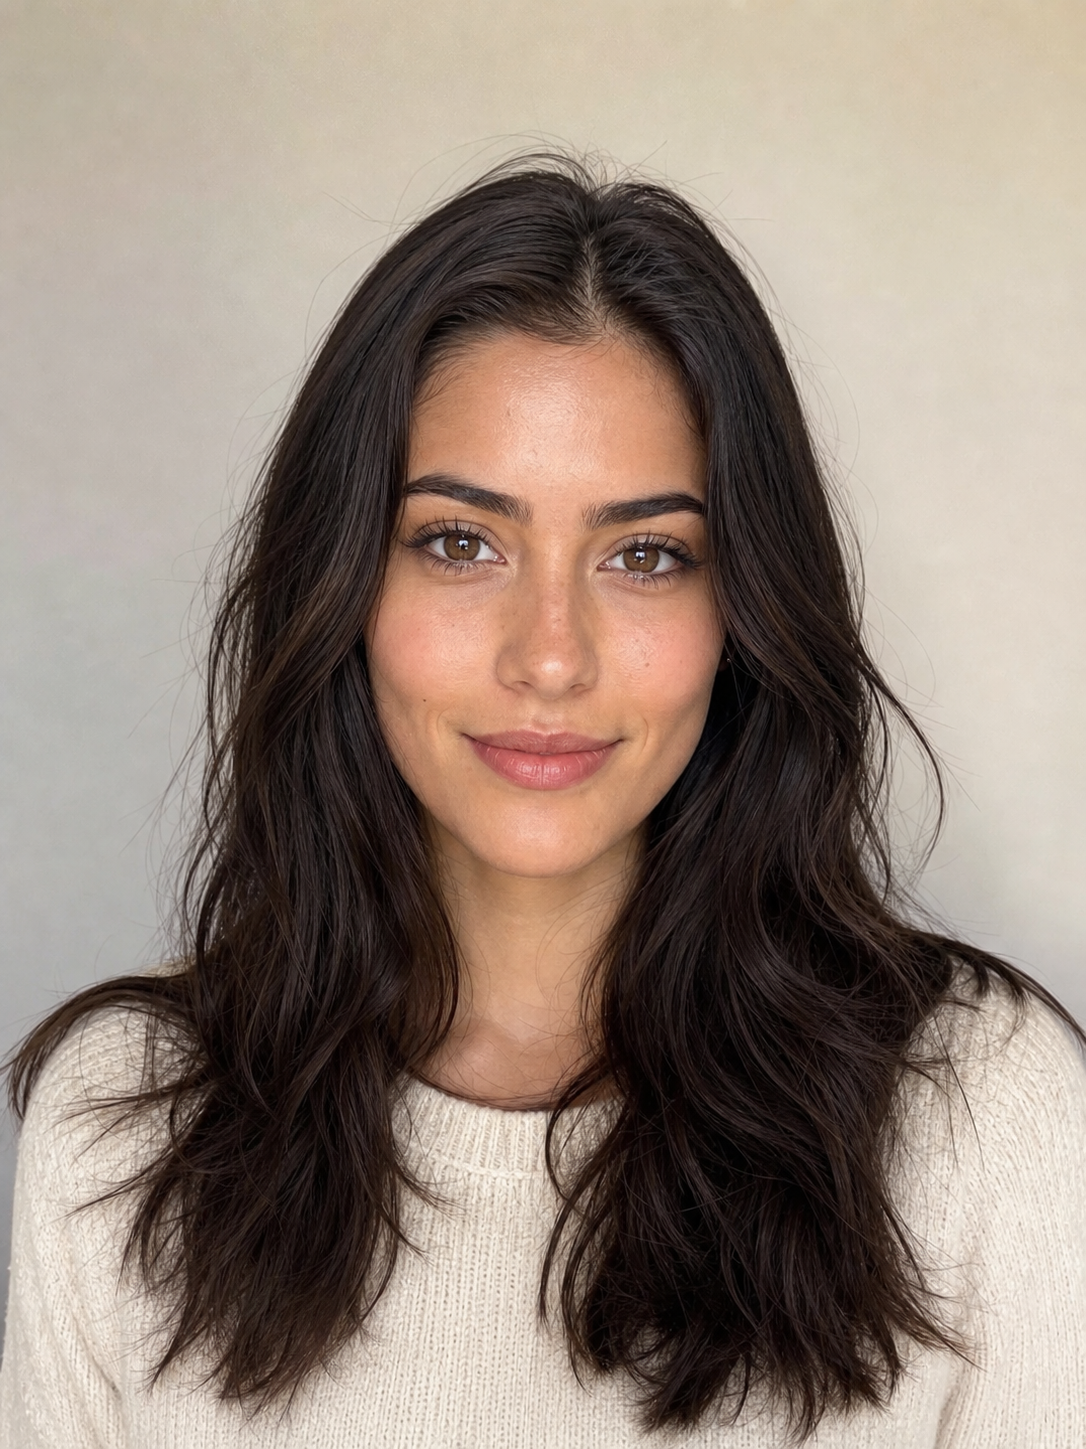
Create one photorealistic portrait of an original fictional adult woman aged 29.
Long dark brown hair with a loose natural wave, hazel eyes, dark brows,
a softly defined jaw and natural makeup. Friendly, relaxed expression.
Head and shoulders, facing the camera, both eyes visible.
A cream crew-neck top. Soft window light and a plain light-gray wall.
Keep the whole head in frame. One photograph, no collage and no added text.
Inspect the eyes, hairline, nose, mouth, skin texture and jaw at full size. Keep the portrait you want to build around. Switching portraits with every outfit makes it difficult to judge whether the identity is holding.
Download the original-size file as nora-identity-front-v1. Beside it, save the prompt, tool, model shown in the interface and date. That gives you a stable point to return to when a later scene needs correcting.
For the cafe portrait, a clear face is the main identity input. For full-body outfits, add a body view and inspect proportions as well. Each reference should answer a production need. A collection of conflicting versions of the face will make your next decision harder.
4. Attach the reference and request the cafe scene
In Gemini, open the image in Library and choose Chat, or upload your saved reference to an image conversation. Then describe the new shot. Google’s editing instructions cover both approaches.
The reference supplies the person. The scene instruction supplies the setting, action, clothes, light and framing. Keep those jobs separate:
Use the attached portrait as the identity reference for the same fictional adult.
Keep the face shape, eye shape, hairline, hair length and skin tone consistent.

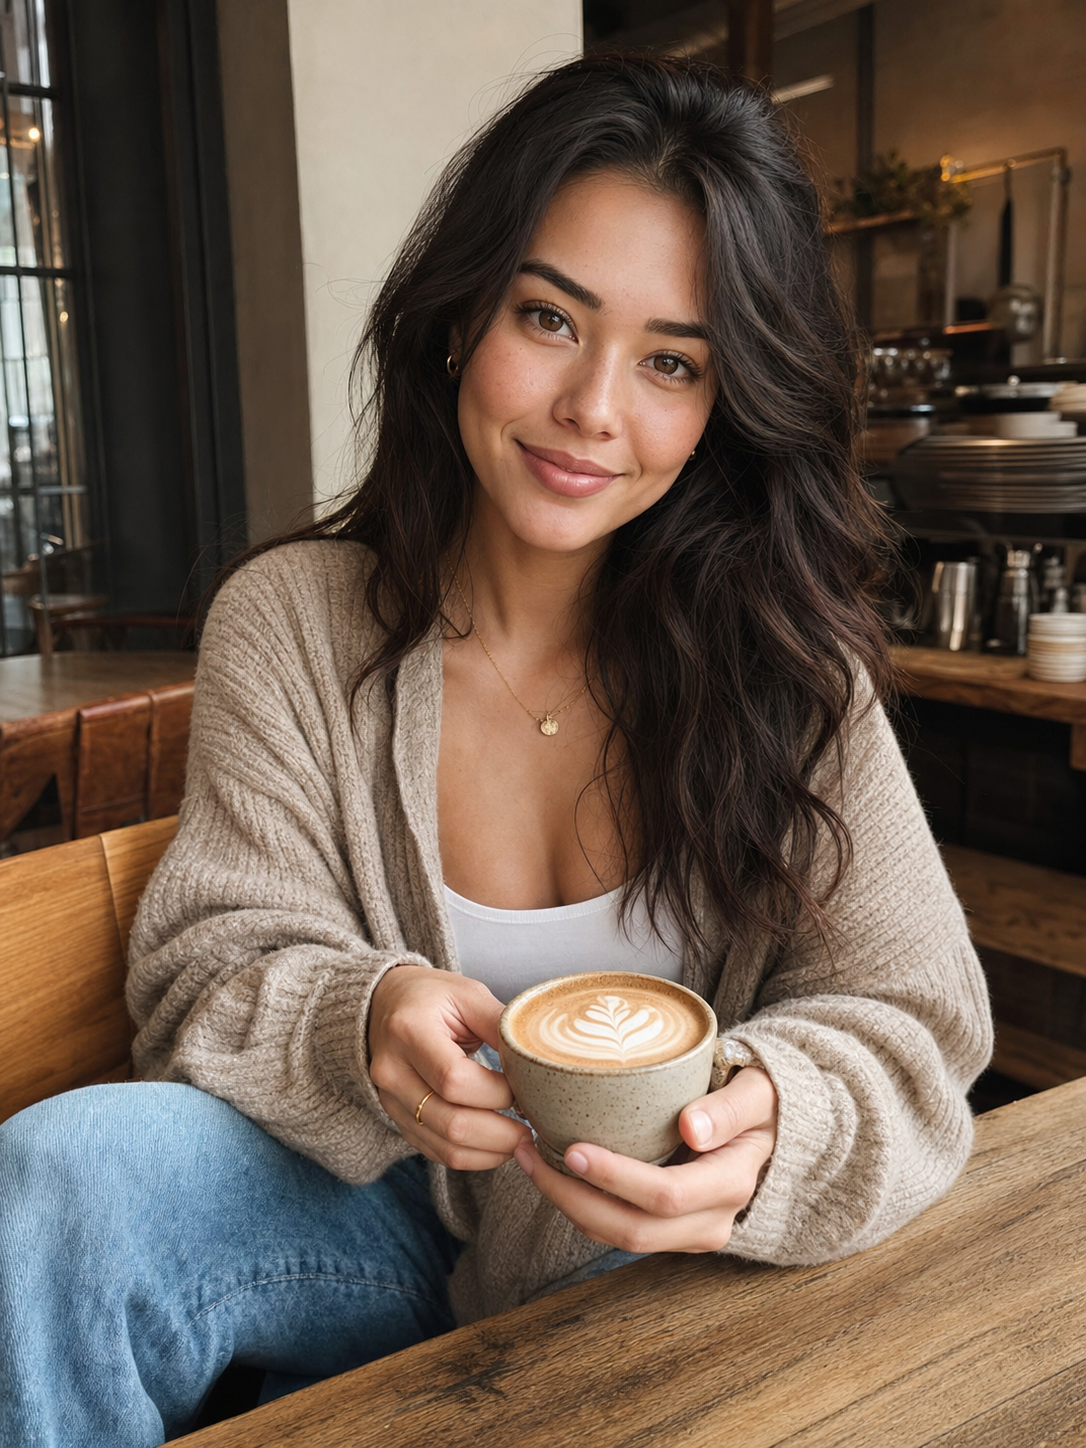
Seat her at a quiet cafe table, holding a plain ceramic coffee cup in both hands.
Cream cardigan over a white top. Relaxed expression, looking at the camera.
Soft window light from the left. Wooden table and softly blurred cafe interior.
Medium portrait showing the head, torso, both hands and the cup.
One vertical photograph, no collage and no added text.
The cup is plain because the first task is a character scene. A particular branded product would introduce another reference and another set of details to inspect. Keep the first production decision easy to evaluate.
If the editor exposes size or aspect-ratio controls, choose a portrait format. Keep the same model and settings while making your first adjustments so you can trace what changed.
5. Build your own scene prompt
Change the fields below, copy the prompt and attach your reference in your image editor. This builder prepares the text for that request.
Save the brief beside the reference. After production, record the output size, attempts, accepted version and what you changed. A named file and a short log are easier to reuse than a long chat history.
6. Review identity, then the scene
Open the result beside the portrait at a similar face size. Compare identity first, then inspect the action and background. A convincing cafe can distract you from a changed face or an awkward hand.
In the gallery cafe image, both hands meet the cup, the table grounds the pose, and the hair and facial features remain visible. Use the same specific observations when reviewing your own output.
| Part | Inspect | If it fails |
|---|---|---|
| Face | Eye spacing, nose, mouth and jaw against the portrait | Simplify the scene and reattach the approved identity |
| Hair | Length, parting and overall shape | State the fixed hair features explicitly |
| Hands and cup | Fingers, handle, contact and scale | Simplify the grip or put the cup on the table |
| Outfit | Garment, sleeves and neckline | Change the outfit instruction while keeping identity fixed |
| Framing | Room for the face, hands and final crop | Request a wider composition |
| Background | Stray objects, signs or distorted lettering | Simplify the setting |
Write a decision such as “keep the face; change the hand pose.” That identifies a useful next edit. “Make it better” leaves the editor to guess what you disliked.
7. Correct one problem at a time
If the cup grip is awkward but the face and light work, keep that result as the edit input and ask for one local change:
Keep the person, face, outfit, lighting and composition unchanged.
Place the cup on the table. Let both hands rest naturally beside it.
Keep the hands separate from the cup handle.
If the face changed, return to the approved identity portrait. Avoid making every new scene from the latest scene: an unnoticed change can become the next output’s starting point.
For a different location, keep the identity instruction and replace the scene section. The prompt guide shows how to separate identity, action, clothing, light and framing into reusable blocks.
8. Finish a first post
Choose a crop that keeps the face, hands and cup readable. For this example, a 4:5 portrait at 1080 by 1350 pixels is a useful delivery target. Check the exported file’s dimensions, not just the preview.
Here is a post layout using the existing cafe image with a new example caption:

Window seat, warm coffee, one page of plans. What's your usual cafe order?
AI character · Cafe scenes and everyday style
The caption establishes a voice and asks one easy question. For a more practical account, replace the observation with a cafe-work tip or an outfit note.
Google’s help page explains Download full size for retrieving the generated file. Save that original alongside the final crop and caption. The image displayed here is a compressed gallery preview; make production exports from your editor’s full-size file.
9. Plan the next three posts
Keep the theme and change the scene deliberately. Nora’s next set could be a cafe in different light, a street outfit and a desk-planning scene. Each should give the audience a reason to look beyond the face.
| Post | Image task | Caption job | Keep fixed |
|---|---|---|---|
| Introduction | Cafe and coffee cup | Establish the voice and invite a reply | Identity and visual style |
| Outfit | Street scene with a clear full-body view | Explain one outfit detail | Identity, hair and age |
| Routine | Desk or notebook scene | Share a simple planning idea | Identity and conversational tone |
Track time and accepted outputs. The cost guide turns those figures into a budget. The Instagram plan helps organize publishing.
Common questions
Can I create an AI influencer without training a model?
Yes. Start with a reference-capable editor and evaluate it on your required scenes. Training becomes a separate option if the reference workflow does not meet the production requirements.
How many references should I start with?
For a medium portrait like the cafe example, begin with a clear identity portrait. Add a body or side view when the shot needs it. Follow the editor’s input limits and avoid conflicting versions of the character.
What if I already bought a model?
Use the supplied references, check the included workflow and begin with one simple scene. The buying guide explains what to inspect in the package.
What should I finish before opening more accounts?
Finish one recognizable character, one usable scene, one export and one caption. Save the files and prompt so the next post does not require rebuilding the identity.